
Philips E-Paper Installation Guide
Introduction
Touchify for e-paper includes two different operating modes:
Connected mode:
The display is connected to the Internet and to Touchify. Content is created from the Touchify interface and published remotely to the e-paper display.
This is the right mode for centralizing all your content and controlling distribution across your e-paper displays.
All Touchify features are available, including widgets and dynamic data.
The only differences are that video playback and animations are not available, because they are not compatible with e-paper displays.
Standalone mode:
The display is not connected to the Internet or to Touchify. Content is loaded onto the display from a smartphone or tablet through the display's Wi-Fi hotspot.
This is the right mode for publishing content on an e-paper display without Internet access, or for quickly controlling a local e-paper display.
In this mode, the display can receive images and PDF documents.
Prerequisites
To install Touchify Player on a Philips e-paper display, you need:
- A Philips e-paper display
- A USB to micro-USB cable to connect the display to a computer
- A Windows computer to run the installer
On the computer, you will need the following software:
- The USB driver for Philips e-paper displays: Download
- The scrcpy software to view the e-paper screen on your computer: Download
- The Touchify installer for e-paper: Download
Install the USB driver
Before connecting the display to your computer, you must install the USB driver for Philips e-paper displays.
Download the driver from the link above, then extract the ZIP file and run DriverInstall.exe to install the driver.
Connect the display to your computer
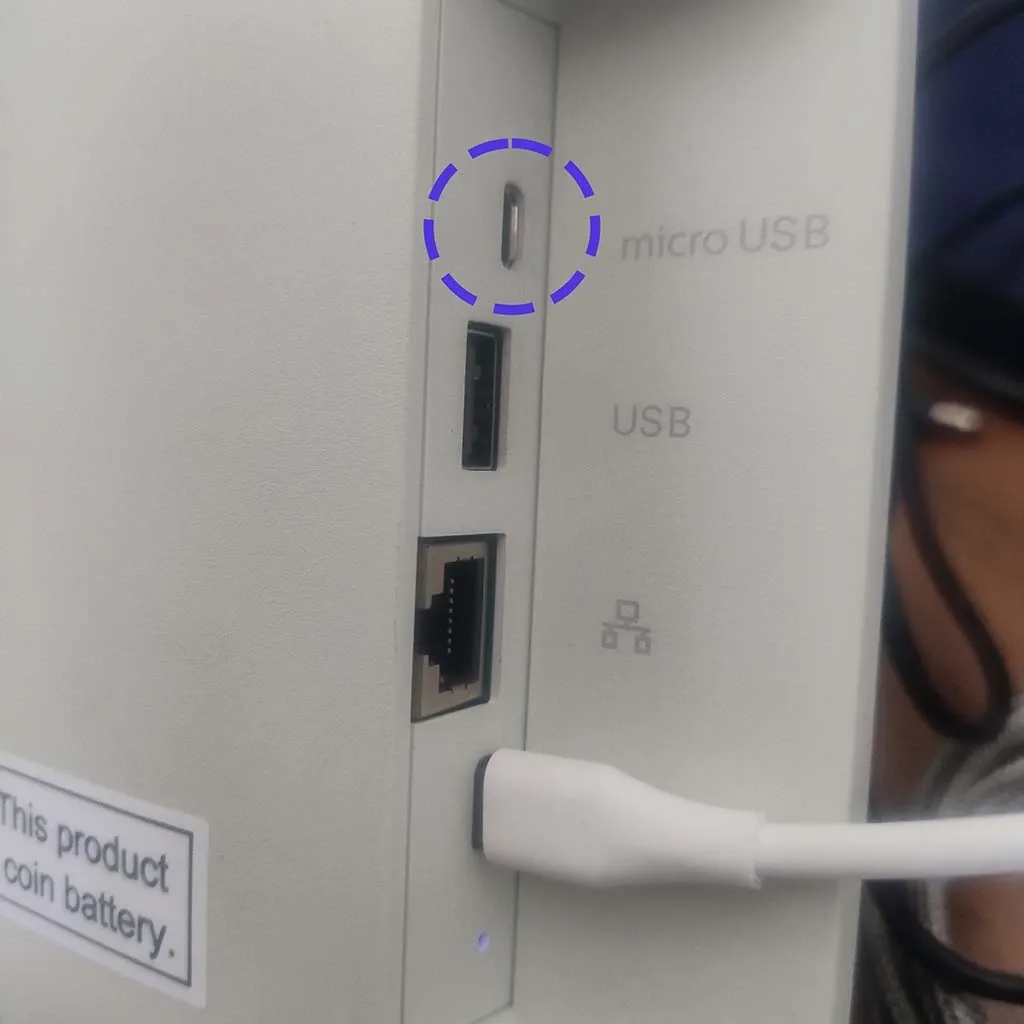
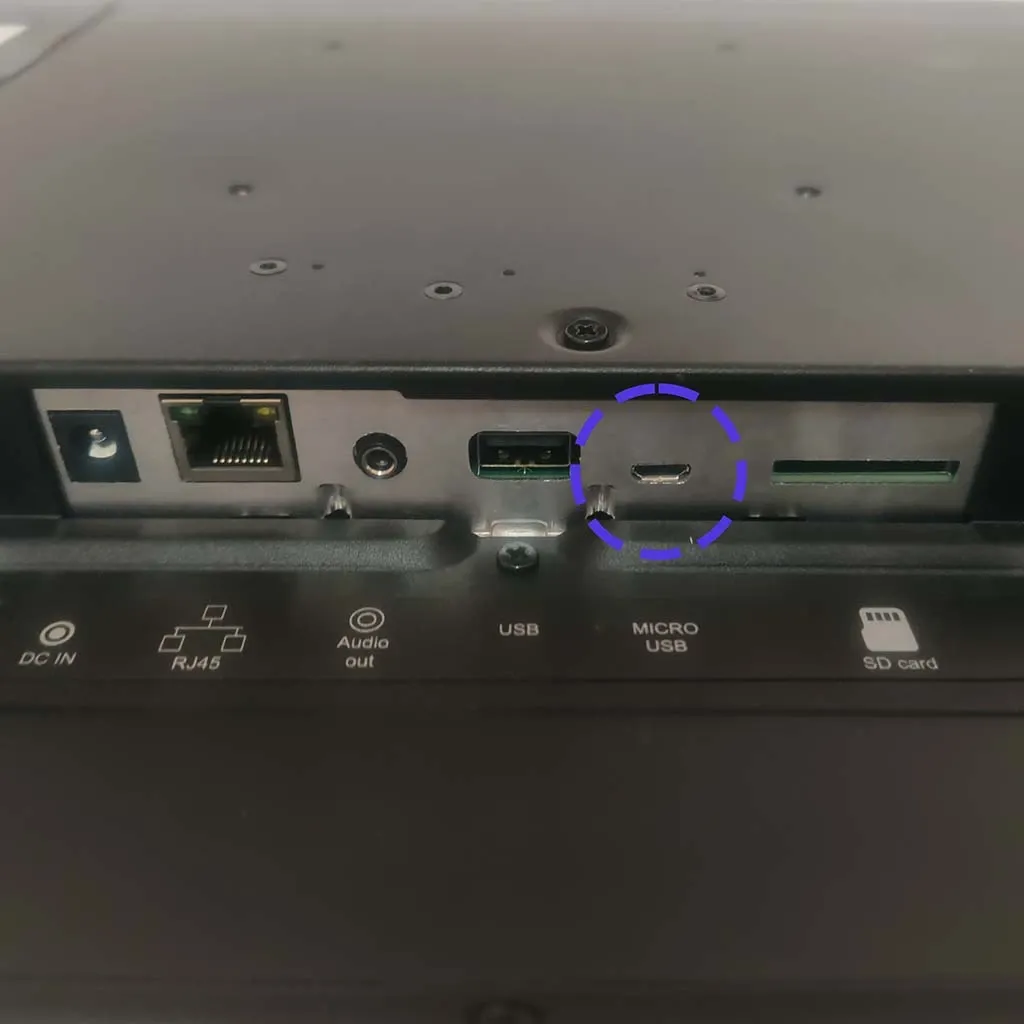
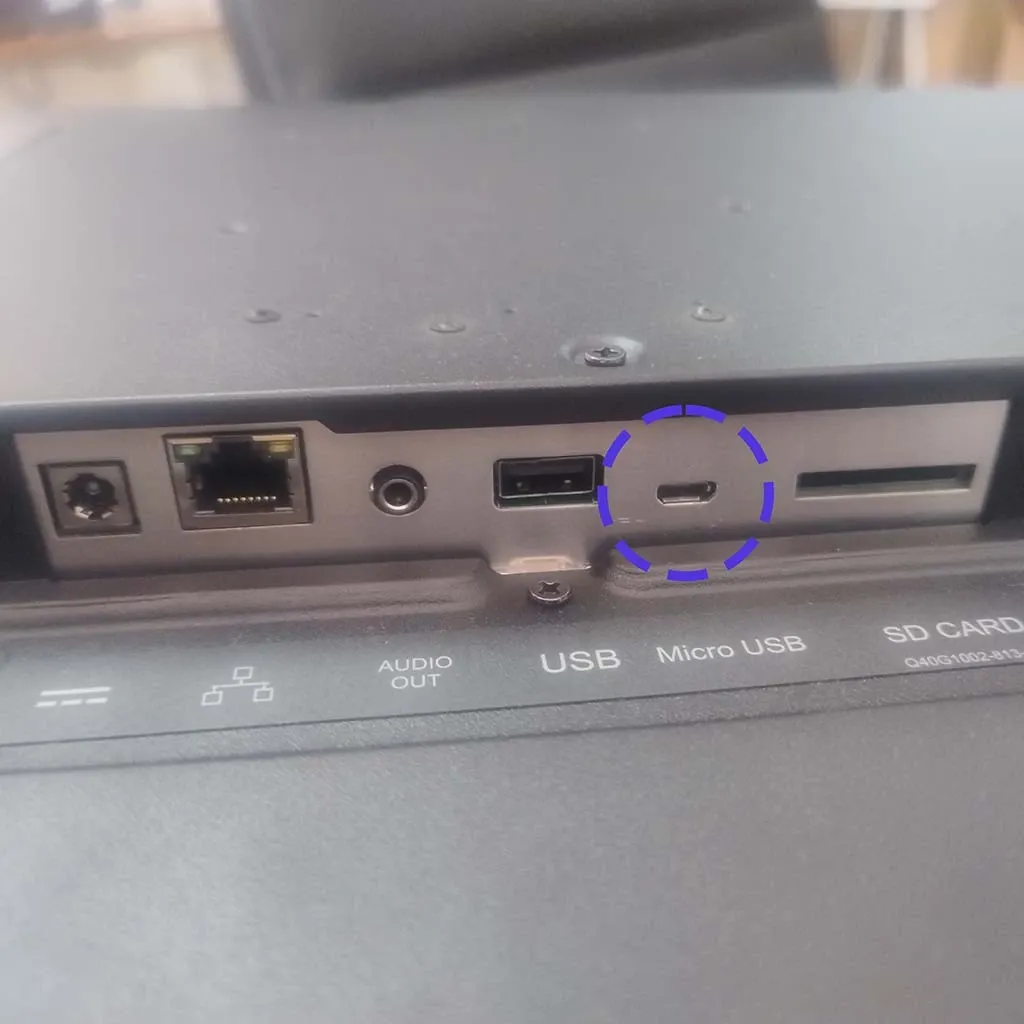
To begin, connect the e-paper display to your computer using the USB to micro-USB cable. The micro-USB port is located on the back of the display, next to the power port and the USB-A port.
Run the e-paper installer
Once the display is connected to your computer, download the Touchify e-paper installer from the link above and run installer.exe to start the installation of Touchify Player on the e-paper display.
The installer automatically detects the connected display and lets you choose the installation mode.
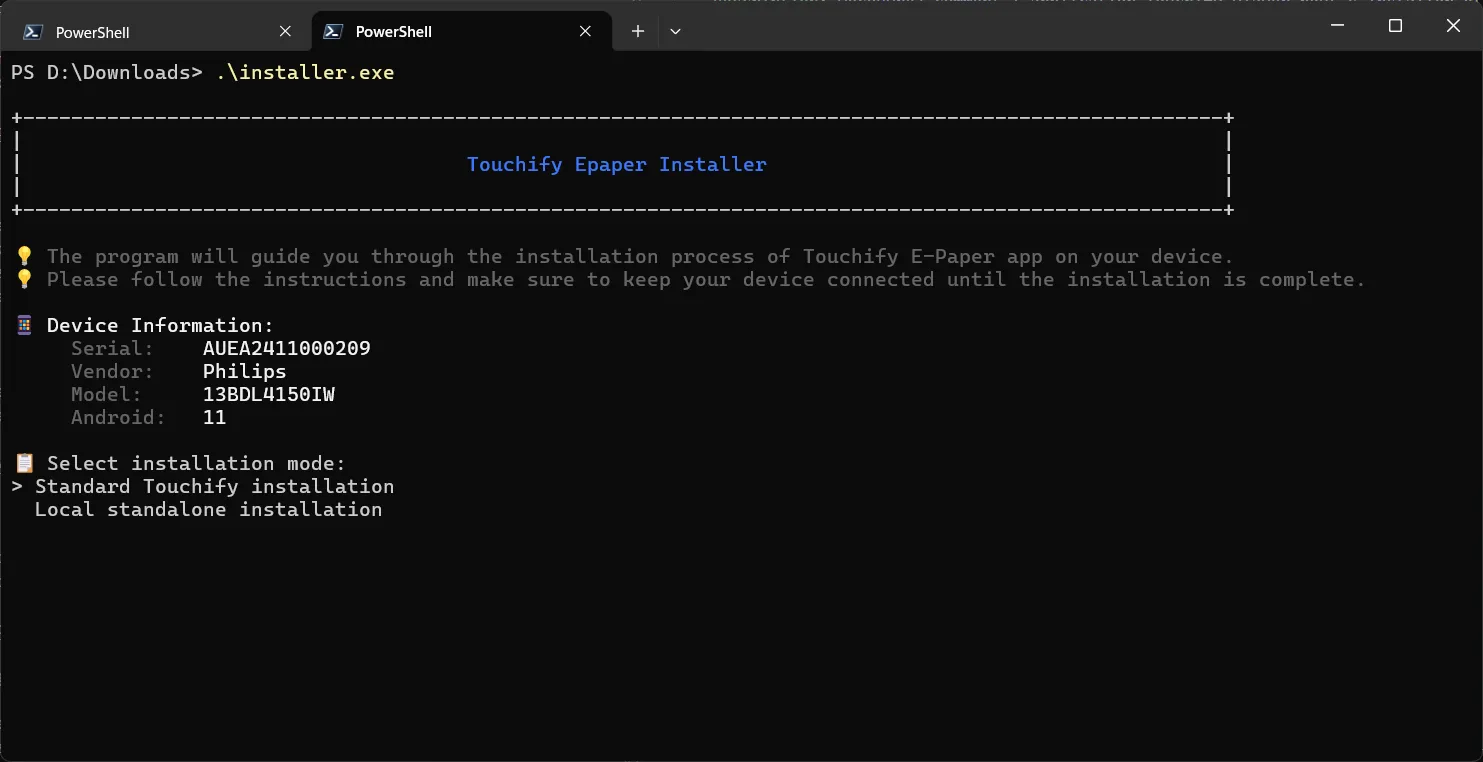
Standard Touchify installation
Select the "Standard Touchify installation" mode to install Touchify Player in connected mode. In this mode, the e-paper display is connected to the Internet and to Touchify, and content is created from the Touchify interface and published remotely to the e-paper display. This is the right mode for centralizing all your content and controlling distribution across your e-paper displays. All Touchify features are available, including widgets and dynamic data. The only differences are that video playback and animations are not available, because they are not compatible with e-paper displays.
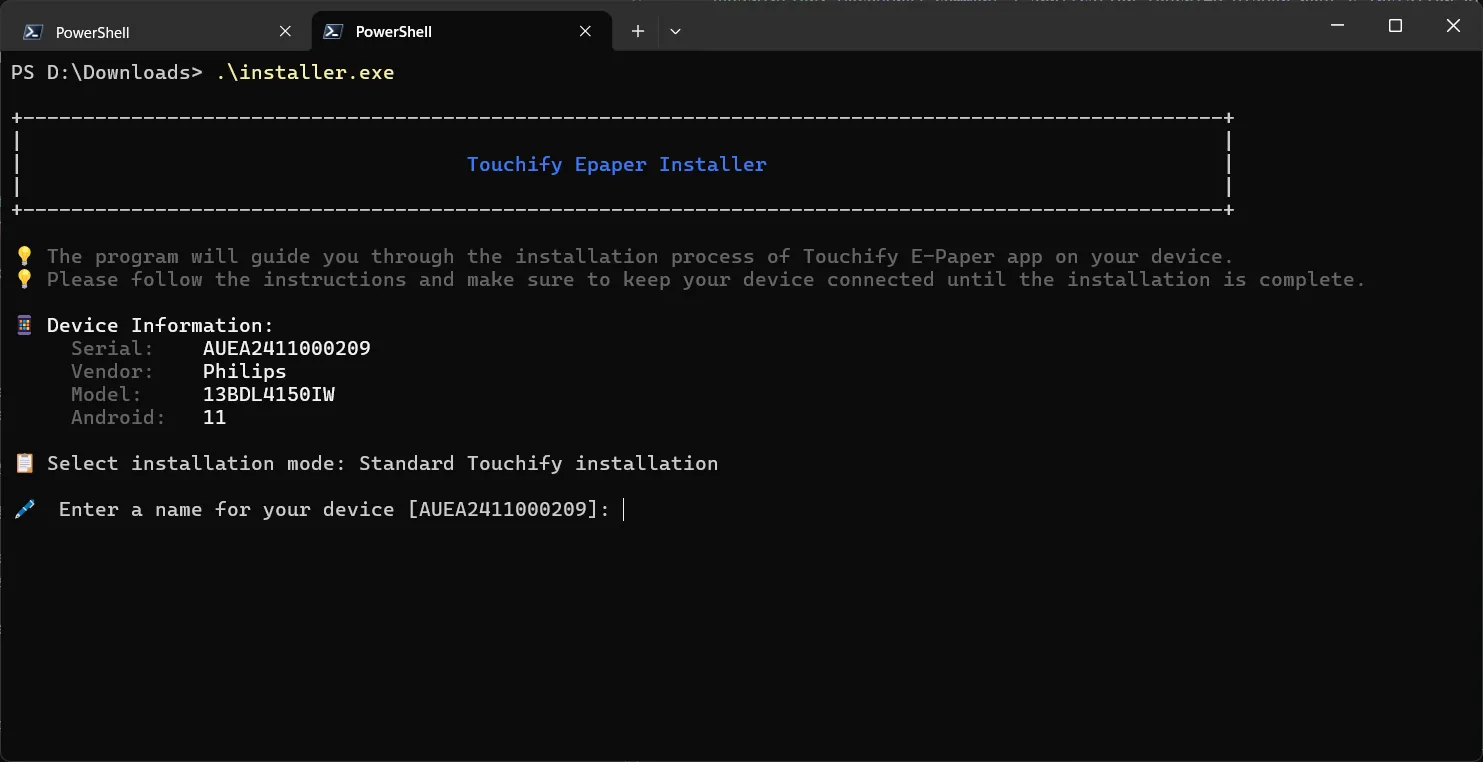
Customize the display name
The installer lets you customize the e-paper display name to make it easier to identify in Touchify Publisher. Enter the name you want to give your e-paper display, or leave the field blank to keep the default name.
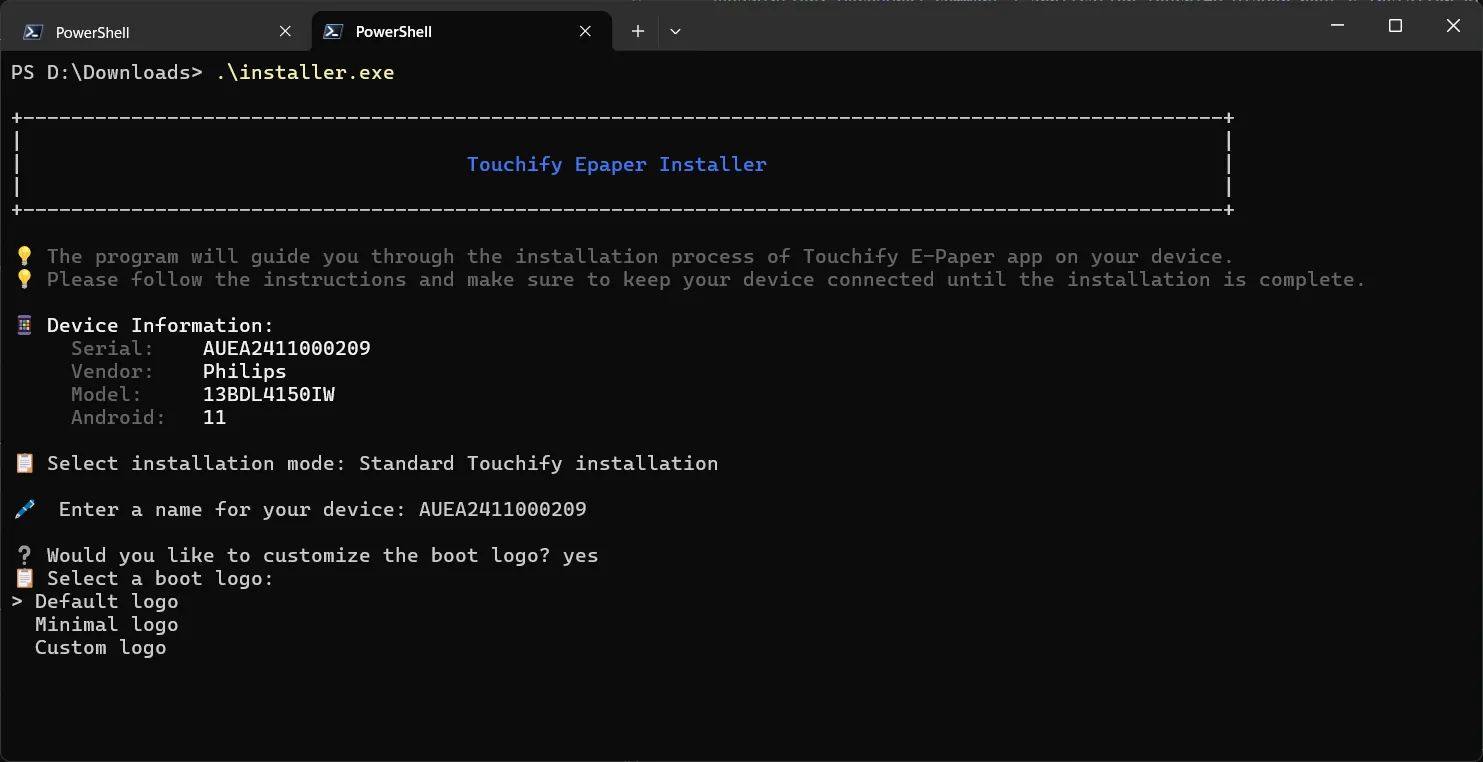
Customize the startup logo
The installer lets you customize the startup logo of the e-paper display to remove the default Philips logo. Type "y" and select a logo from the list, or select "n" to keep the default Philips logo.
End of installation
The installer configures the e-paper display and installs Touchify Player. Once installation is complete, the application starts automatically.
Connect the display to Touchify
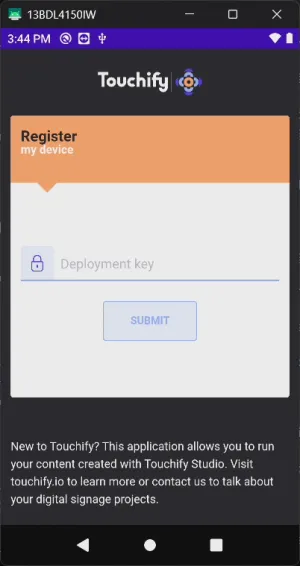
To connect the display to Touchify, you need to link the display to a broadcast group. To do this, go to Touchify Publisher, create a broadcast group, and copy the deployment key from the group.
To enter the deployment key on the display, download the scrcpy app using the link above.
Enter the deployment key in the corresponding field, then click "Connect" to connect the display to Touchify.
Local standalone installation
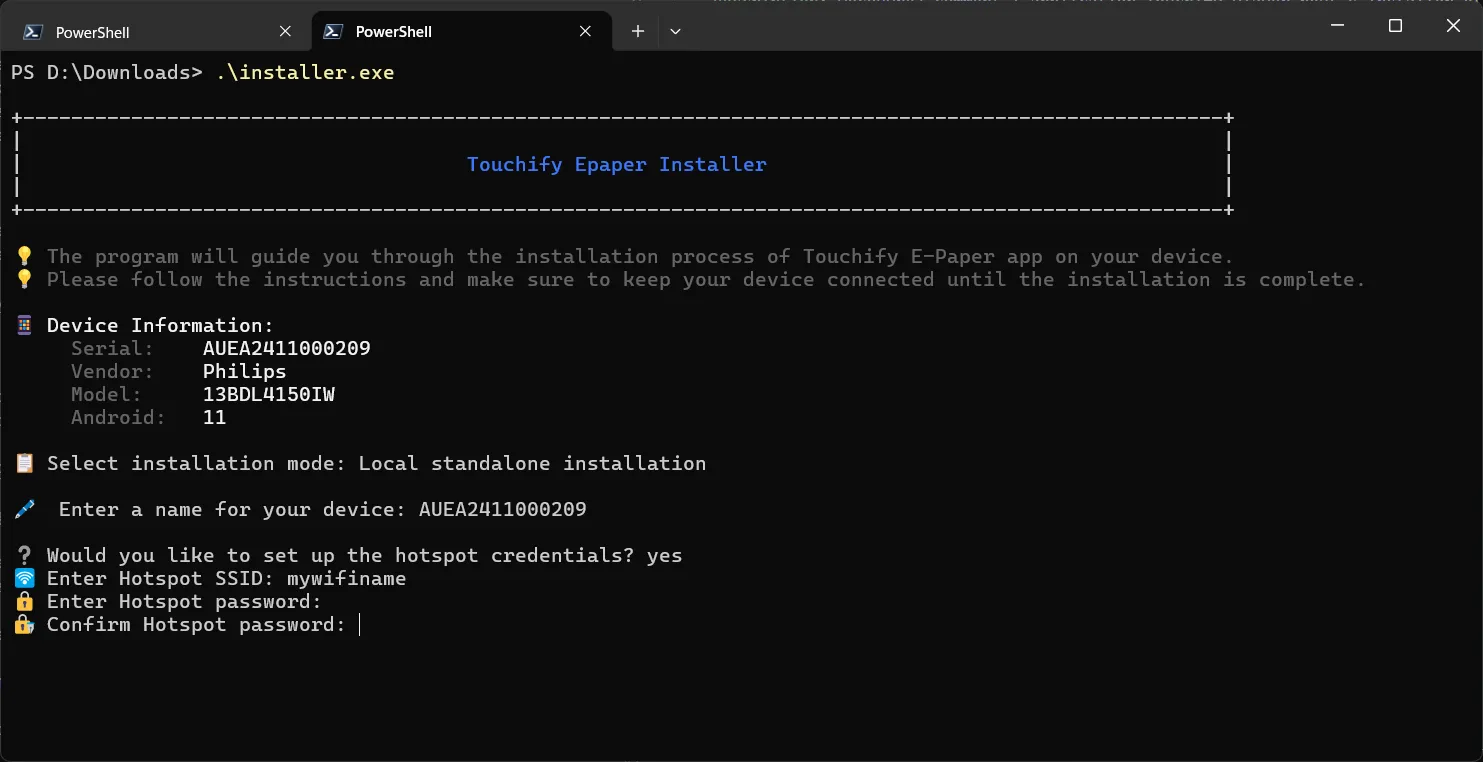
Select the "Local standalone installation" mode to install Touchify Player in standalone mode. In this mode, the display is not connected to the Internet or to Touchify. Content is loaded onto the display from a smartphone or tablet through the display's Wi-Fi hotspot. This is the right mode for publishing content on an e-paper display without Internet access, or for quickly controlling a local e-paper display. In this mode, the display can receive images and PDF documents.
Customize the display name
The installer lets you customize the e-paper display name to make it easier to identify. Enter the name you want to give your e-paper display, or leave the field blank to keep the default name.
Configure the Wi-Fi hotspot
The installer asks whether you want to configure the Wi-Fi hotspot credentials for the e-paper display. Type "y" to configure the Wi-Fi hotspot, or "n" to keep the default credentials. If you choose to configure the Wi-Fi hotspot, enter the network name (SSID) and password you want to use for the e-paper display hotspot.
Customize the startup logo
The installer lets you customize the startup logo of the e-paper display to remove the default Philips logo. Type "y" and select a logo from the list, or select "n" to keep the default Philips logo.
Configure standalone mode settings
The installer asks whether you want to configure standalone mode settings. Type "y" to configure standalone mode settings, or "n" to keep the default settings.
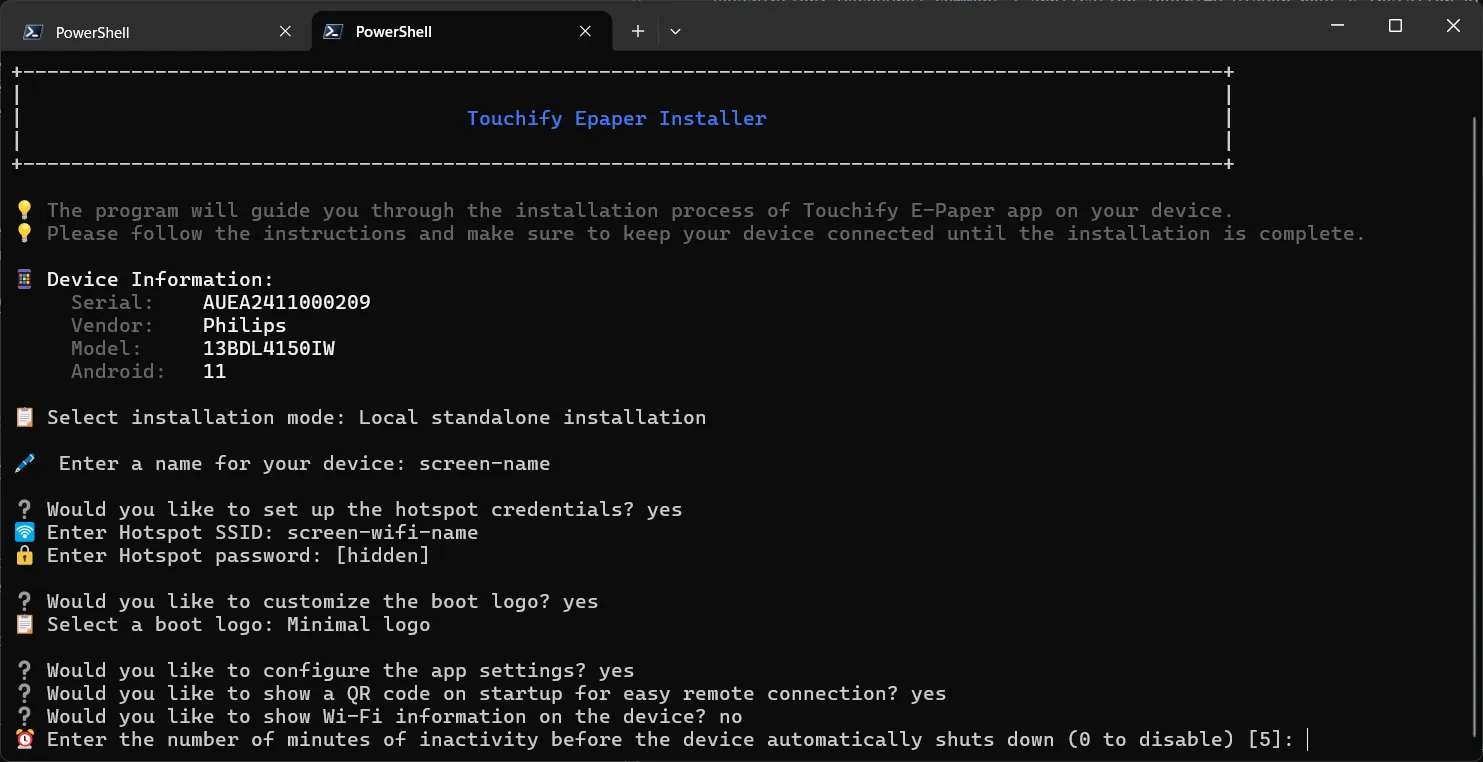
Standalone mode settings are:
- Would you like to show a QR code on startup for easy remote connection? :
Type "y" to show a QR code at startup for easy connection from a smartphone or tablet, or "n" not to show the QR code. - Would you like to show Wi-Fi information on the device? :
Type "y" to display Wi-Fi connection information (SSID and password) on the e-paper display at startup, or "n" not to display Wi-Fi connection information. - Enter the number of minutes of inactivity before the device automatically shuts down? :
Enter the number of inactive minutes before the e-paper display automatically turns off. Type "0" to disable automatic shutdown.
Using standalone mode
This section presents the steps to load content onto an e-paper display in standalone mode.
Connect to the e-paper display Wi-Fi hotspot
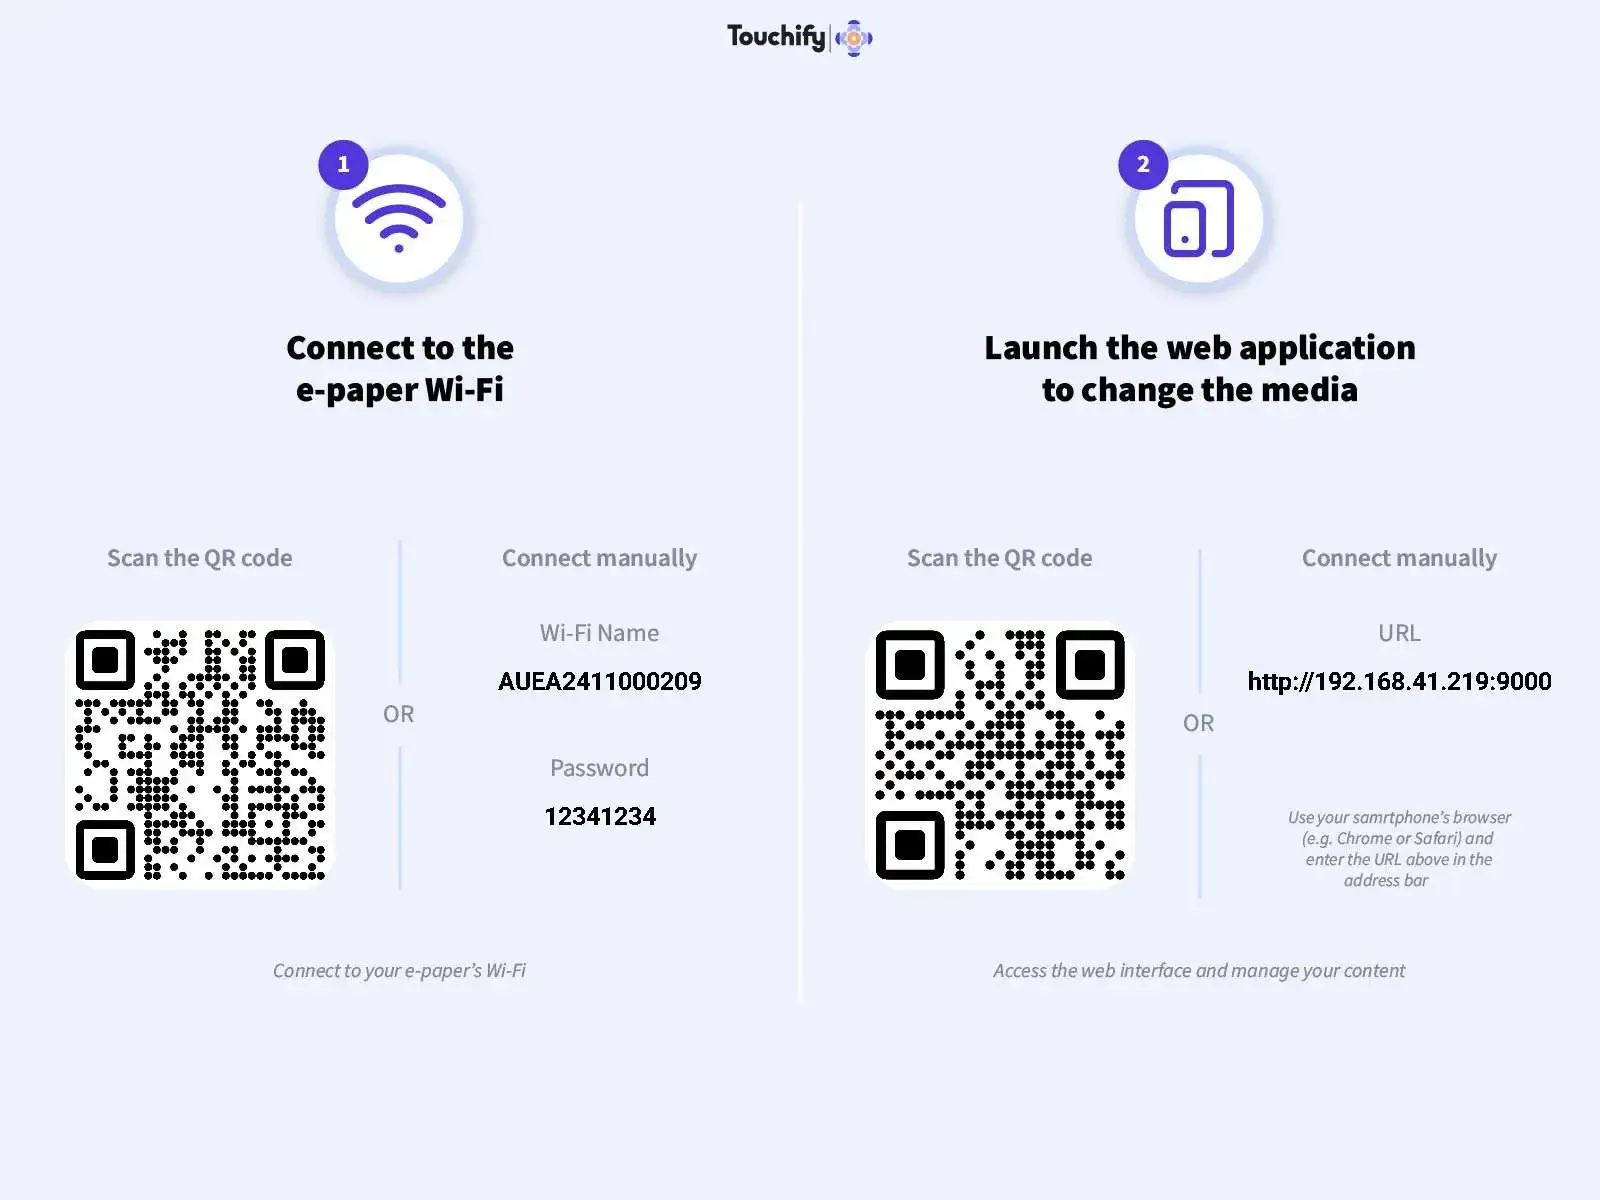
At startup, if you enabled the option to display Wi-Fi connection details, the hotspot credentials for the e-paper display are shown on screen. A QR code is also displayed. By scanning it, your smartphone automatically connects to the e-paper display hotspot.
Open the web app
Once connected to the e-paper display hotspot, open a web browser on your smartphone or tablet and enter the IP address shown on the e-paper display to access the standalone mode management web app. The display also shows a QR code so you can connect to the web app more easily.
Add the display license
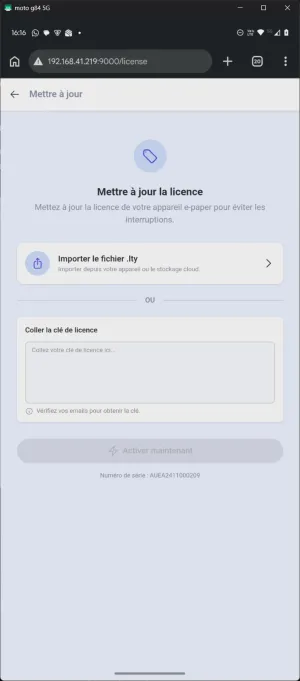
On your first connection, the app asks you to add the e-paper display license to activate standalone mode. If you do not have it yet, request it from your reseller or integrator and provide the e-paper display serial number. The serial number is shown at the bottom of the license page or on the label on the back of the e-paper display.
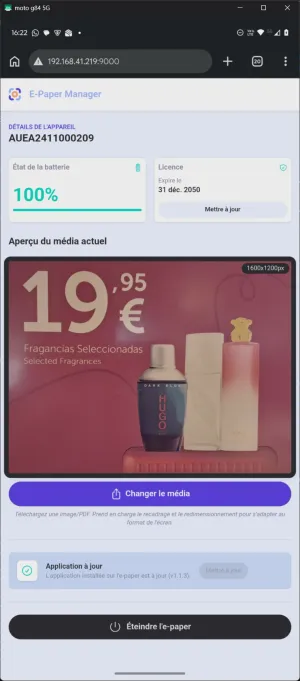
Upload content to the e-paper display
Once connected to the web app, you can upload content to the e-paper display by clicking the "Change media" button.
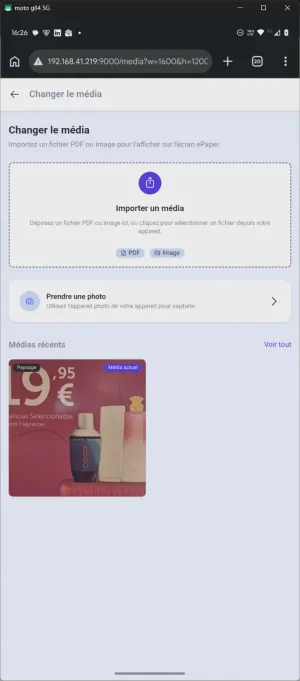
You can then select an image or a PDF document to upload to the e-paper display from your smartphone or tablet.
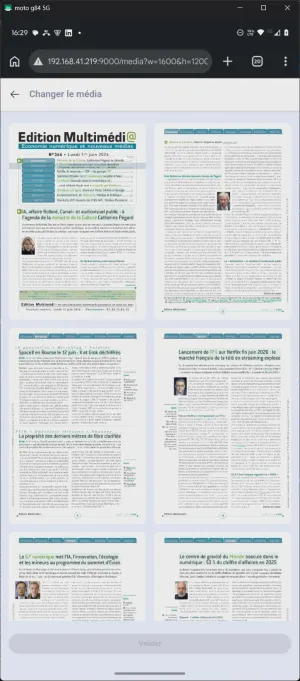
Once media is selected, if it is a PDF document, you can choose which page to display on the e-paper screen.
Before sending media to your e-paper display, you can crop it on your smartphone so it fits the display.
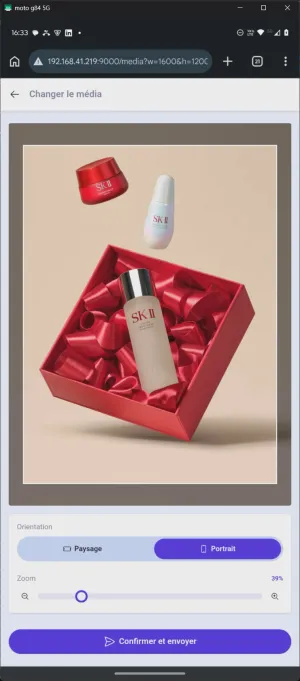
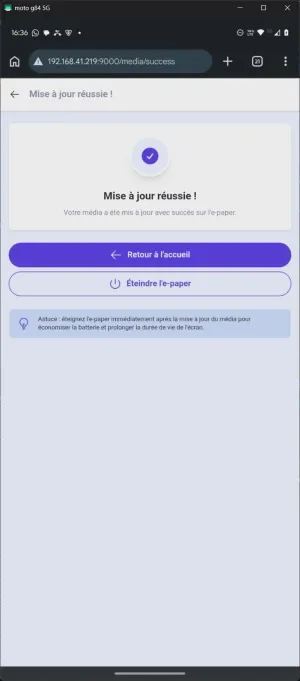
Finally, click "Confirm and send" to upload the media to the e-paper display.