Interactions
Windows
Learn how to create contextual windows with Touchify Studio.
Apply an interaction
To add a "window" interaction, select your element then click the "Element interactions" button (touch icon) in the right sidebar of the interface. Choose the "Text window", "Web window" or "Custom window" interaction.
To add a window to the page, click the "Page interactions" button (touch / page icon) in the right sidebar of the interface. Choose the "Text window", "Web window" or "Custom window" interaction.
Text window
Create a text window that appears after an interaction. Many customization options are available to you, but most of them rely on common Studio features.
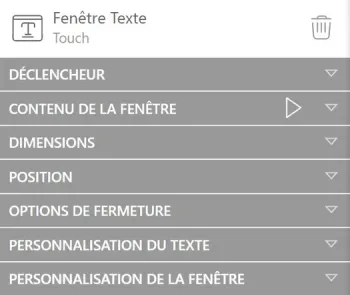
- Trigger: Choose how the window will be activated (to learn more about triggers, go to the article dedicated to interactions)
- Window content: insert the text you want to display in the window
- Dimensions: define the window size
- Position: choose the window position on the page
- Closing options: choose which action will close the window
- Text customization: format your text (to learn more, go to the article dedicated to text customization)
- Window customization: modify your window style (to learn more, go to the article dedicated to background and borders)
Web window
Create a window containing a web page. Define access, dimensions, style...
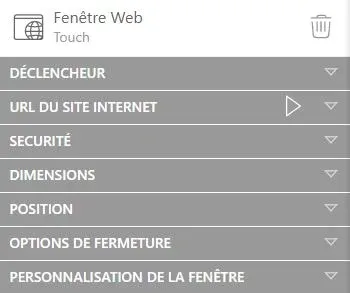
- Trigger: Choose how the window will be activated (to learn more about triggers, go to the article dedicated to interactions)
- Website URL: insert the link to the page you want to display in the window
- Security: modify the access options to your page
- Dimensions: define the window size
- Position: choose the window position on the page
- Closing options: choose which action will close the window
- Window customization: modify your window style (to learn more, go to the article dedicated to background and borders)
Custom window
Create a custom window from a component.
Reminder: create your component before integrating it into a window.
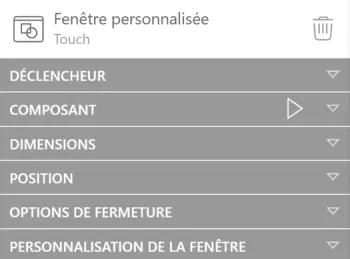
- Trigger: Choose how the window will be activated (to learn more about triggers, go to the article dedicated to interactions)
- Component: choose the component that will display in the window
- Properties: if the widget has properties, modify them to customize it
- Dimensions: define the window size
- Position: choose the window position on the page
- Closing options: choose which action will close the window
- Window customization: modify your window style (to learn more, go to the article dedicated to background and borders)