ChromeOS Installation Guide
Introduction
Three installation options are available for ChromeOS:
- Simple Application: manual installation for use without kiosk mode
- Managed Application: remote installation and configuration via the Google Admin Console
- Kiosk Application: remote installation and configuration via the Google Admin Console
Installation
Option 1: Manual Installation
Use the Google Chrome browser on your ChromeOS device to access the URL: https://player.touchify.app.
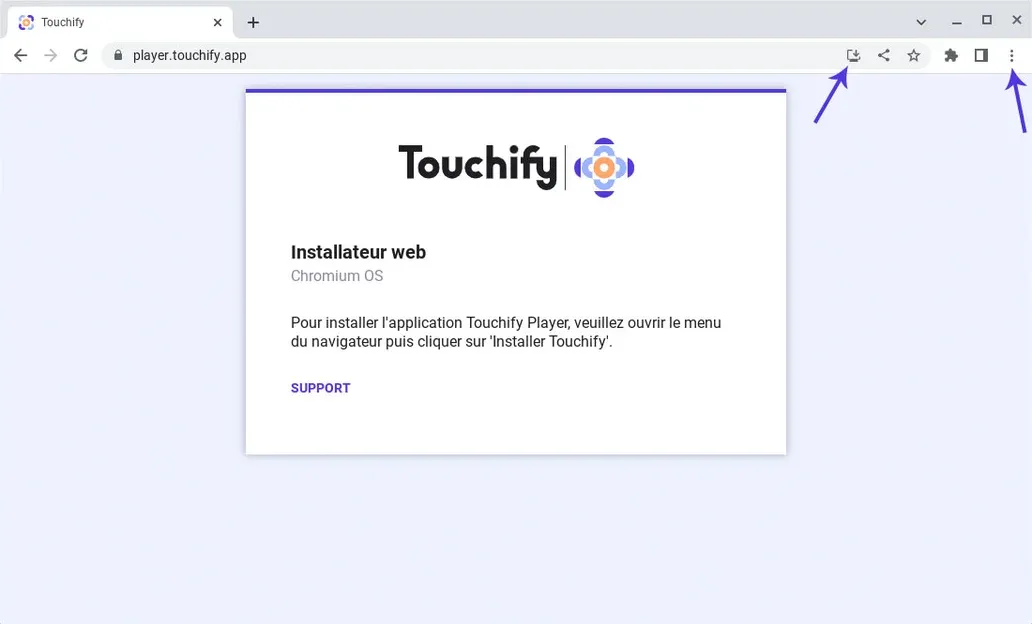
Click the Install icon or open the browser menu and select Install this app.
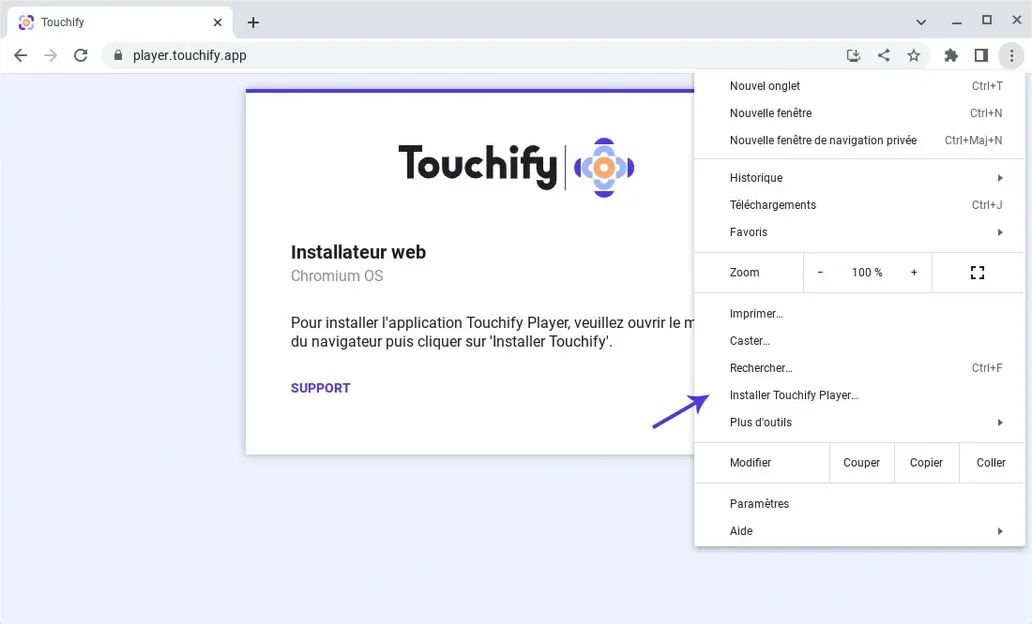
Confirm the installation by clicking the Install button in the confirmation window.

That's it, the Touchify Player app is installed on your device and accessible from the app menu.
If the installer still appears when you first open the app, press the reload button on your keyboard.
Option 2: Managed Installation
To centrally install the Touchify Player app, use the Google Admin Console: https://admin.google.com.
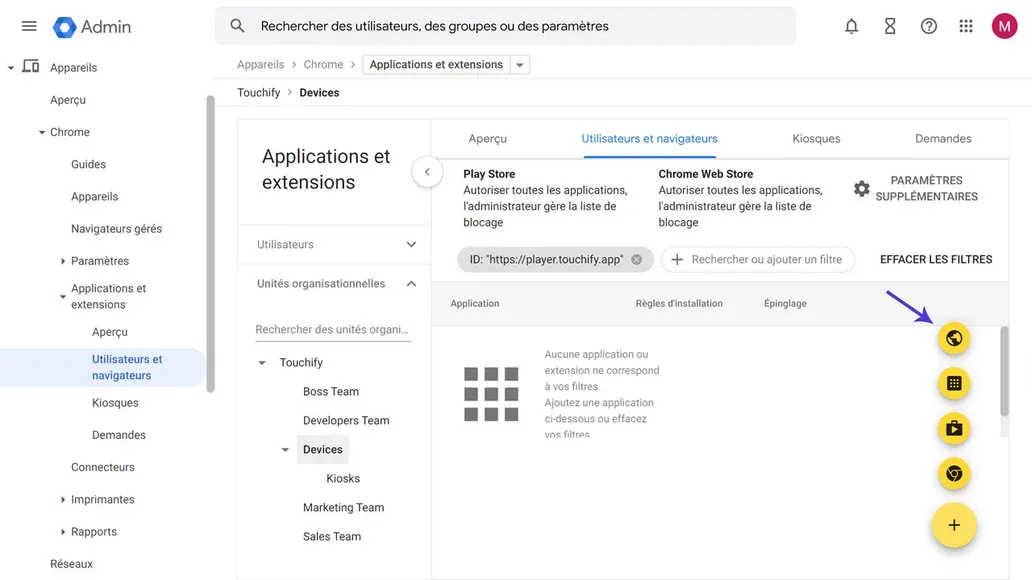
In the Google Admin Console menu, navigate to Devices → Chrome → Apps & extensions → Users & browsers.
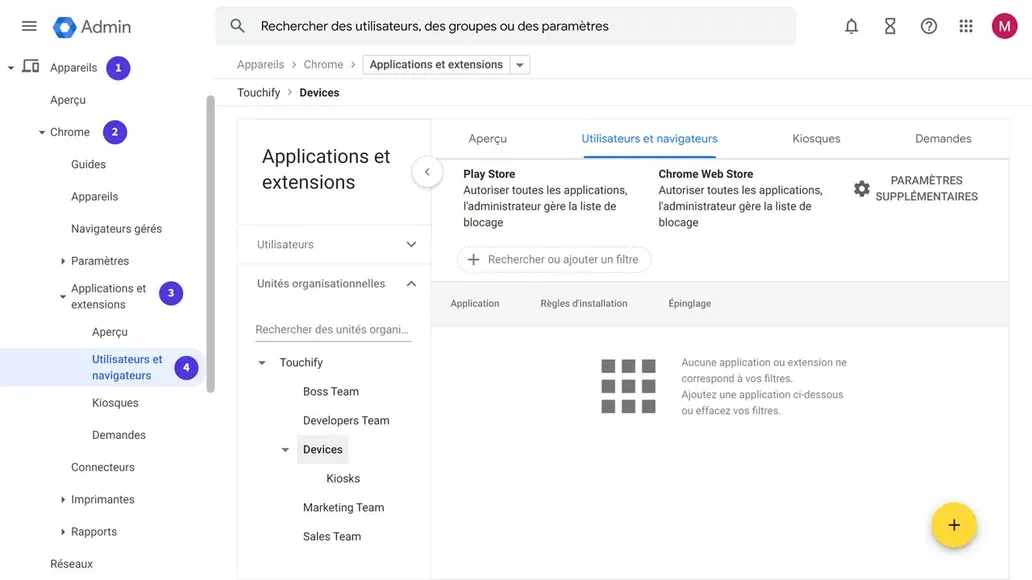
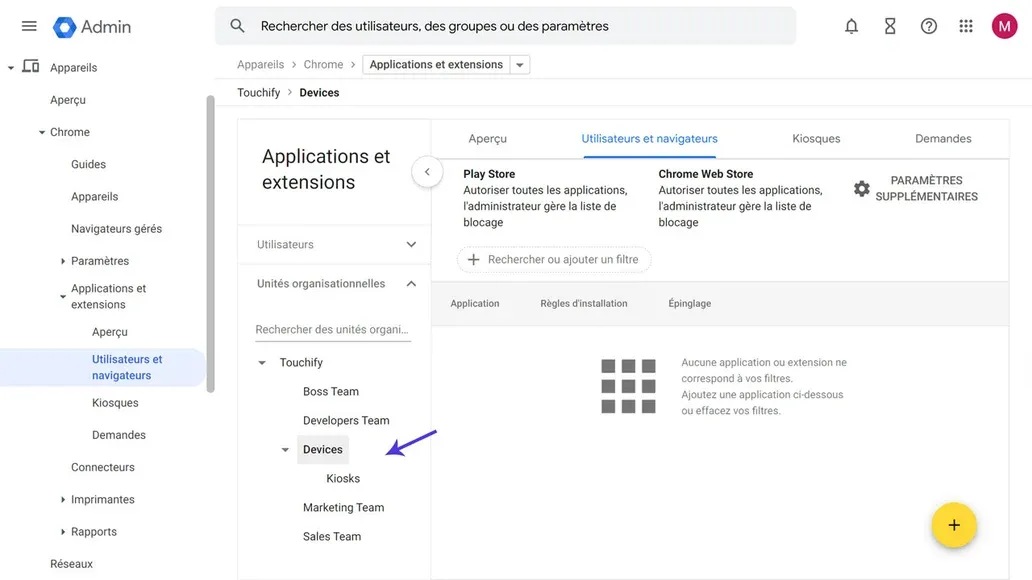
Select the Organizational Unit where you want to deploy the Touchify Player app. To learn more about Organizational Units, click here.
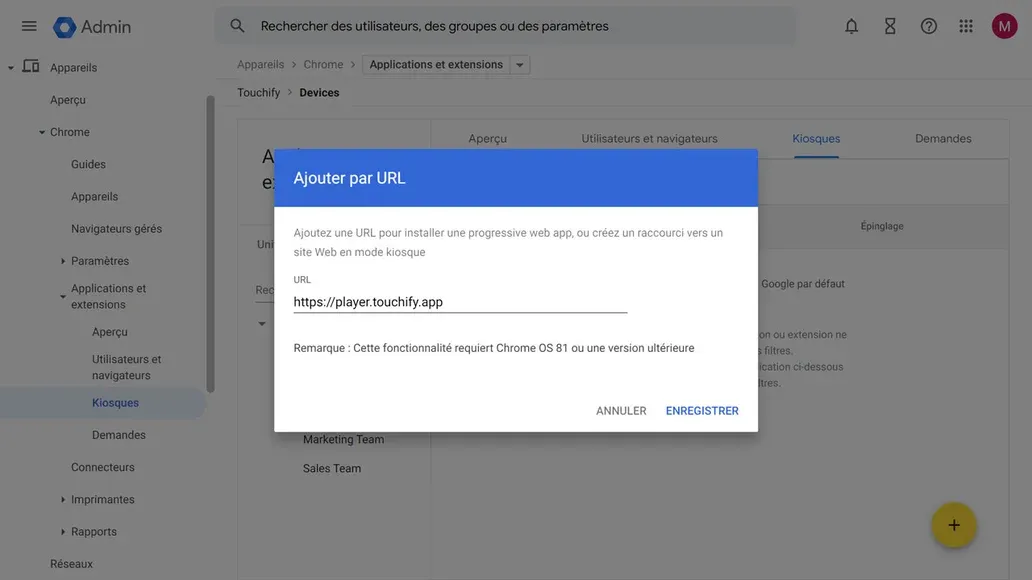
Click the + button at the bottom right of the screen, then select Add by URL (shown below).
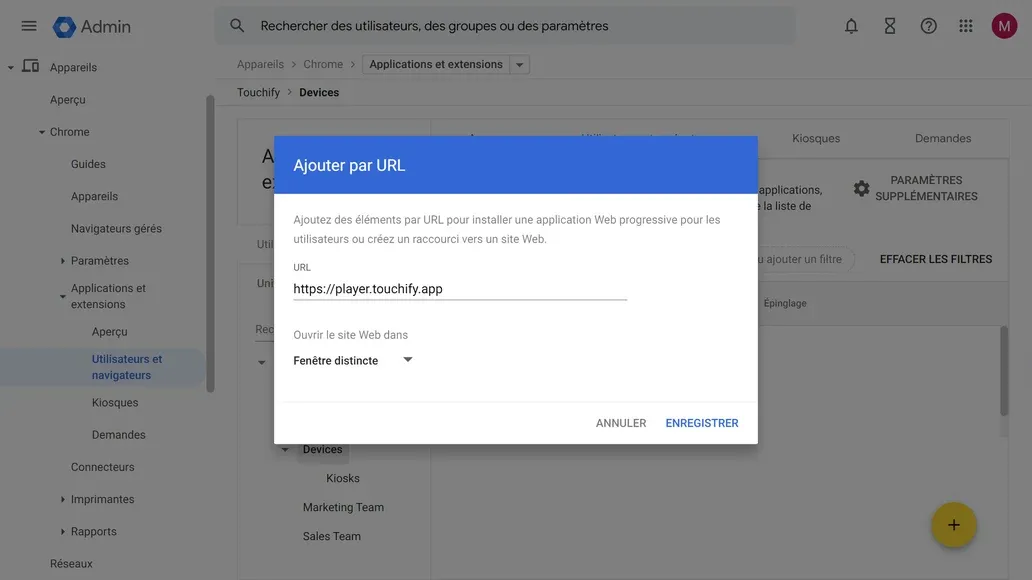
In the configuration window, enter the following settings:
- URL: https://player.touchify.app
- Open the website in: Separate window
That's it, the Touchify Player app will automatically install for all users and devices in the selected Organizational Unit. You can also authenticate your device via the Admin Console. Click here to learn more.
Option 3: Kiosk Installation
To centrally install the Touchify Player app, use the Google Admin Console: https://admin.google.com.
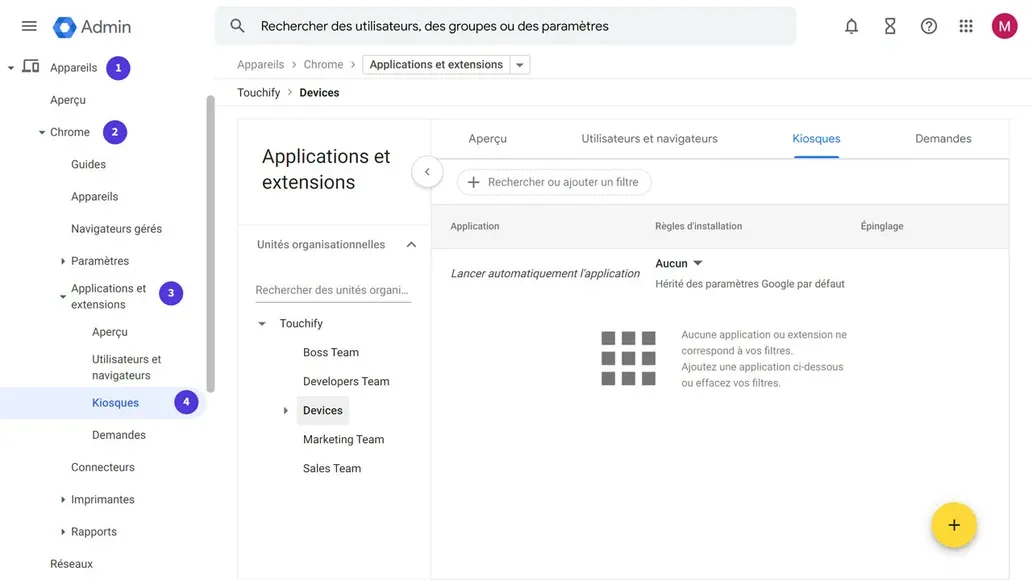
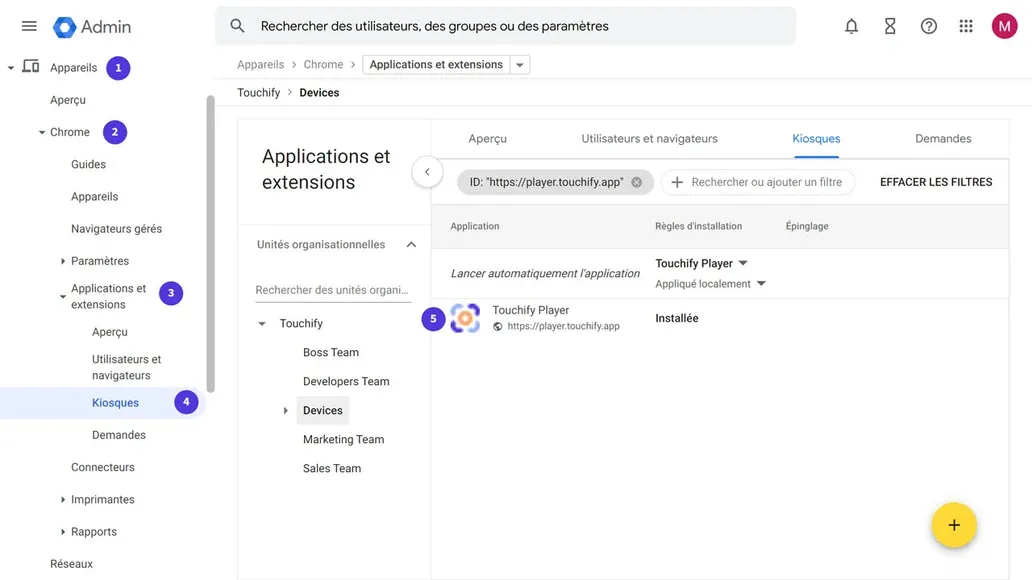
In the Google Admin Console menu, navigate to Devices → Chrome → Apps & extensions → Kiosks.
Select the Organizational Unit where you want to deploy the Touchify Player app. To learn more about Organizational Units, click here.

Click the + button at the bottom right of the screen, then select Add by URL (shown below).
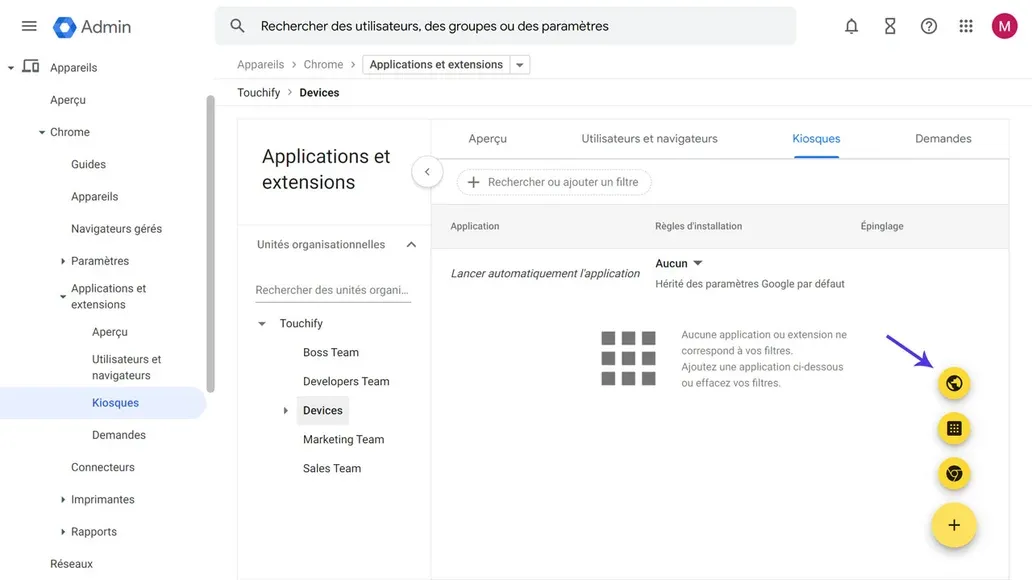
In the configuration window, enter the following URL: https://player.touchify.app then click Save. A confirmation window appears, click Accept.
Once the app is added, it must be set as the default app. To do this, click the Automatically launch app selector and select Touchify Player.
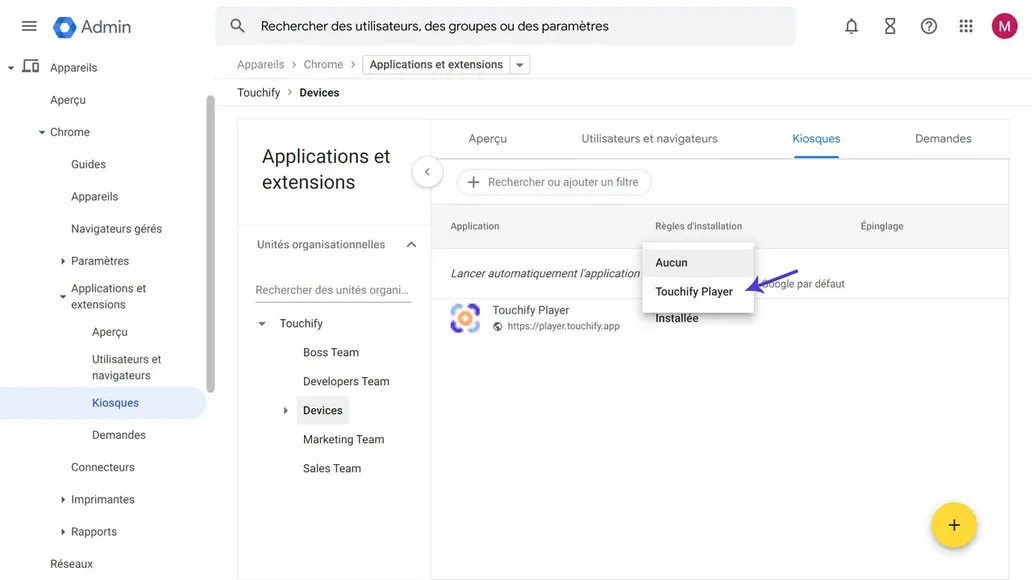
That's it, the Touchify Player app will automatically install and configure in kiosk mode on all devices in the selected Organizational Unit. You can also authenticate your device via the Admin Console. Click here to learn more.
Sign In
The Touchify Player app offers 2 authentication modes.
Sign in with a user account
Use your credentials to sign in to your user account and access your published projects.
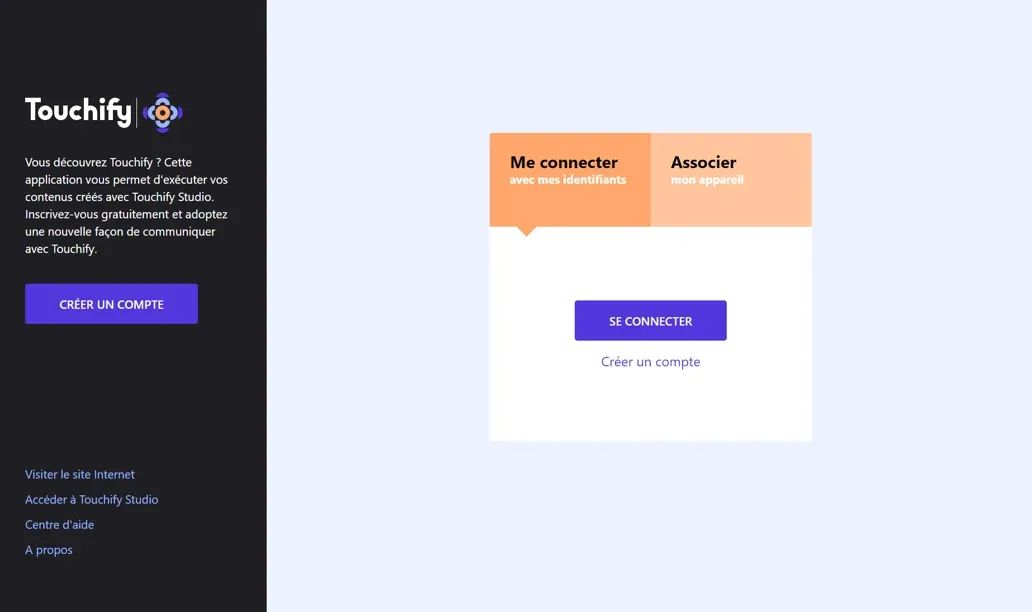
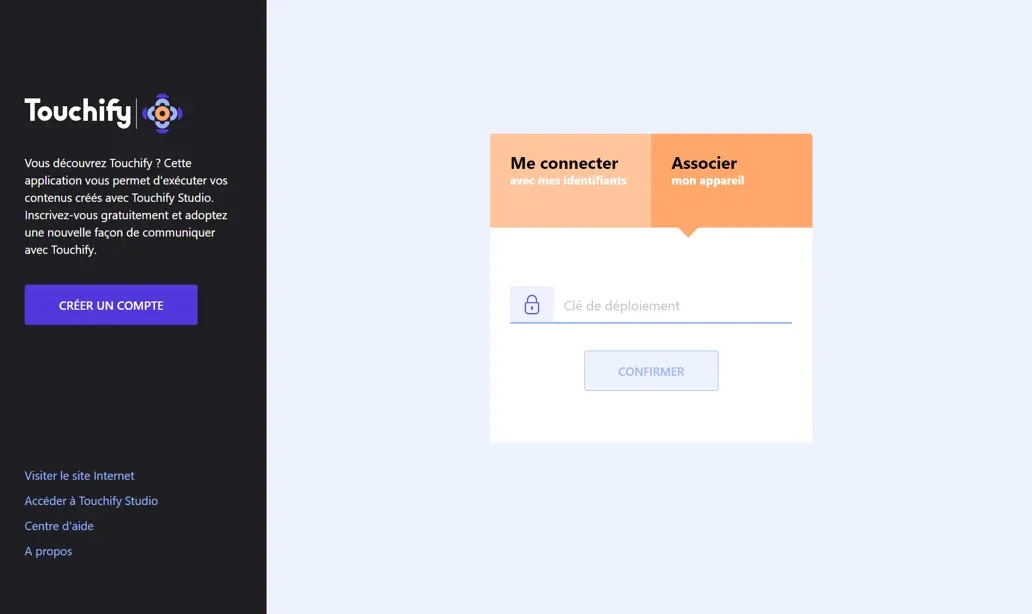
Associate a screen with a broadcast group
Use a deployment key to associate the computer with one or more broadcast groups and control it from Touchify Publisher.
To learn more, see the article Introduction to Touchify Publisher.
You can also associate the device from the Google Admin Console. To learn more, click here.
Configure Kiosk Mode
Kiosk mode for ChromeOS is configured from the Google Admin Console: https://admin.google.com.
This section introduces recommended settings for managing Kiosk devices for digital signage and/or interactive display.
Creating an Organizational Unit
In the Google Admin Console, an Organizational Unit is a group that allows you to gather users and devices that share the same settings.
Organizational units are organized hierarchically. Child units inherit the settings of the parent unit by default.
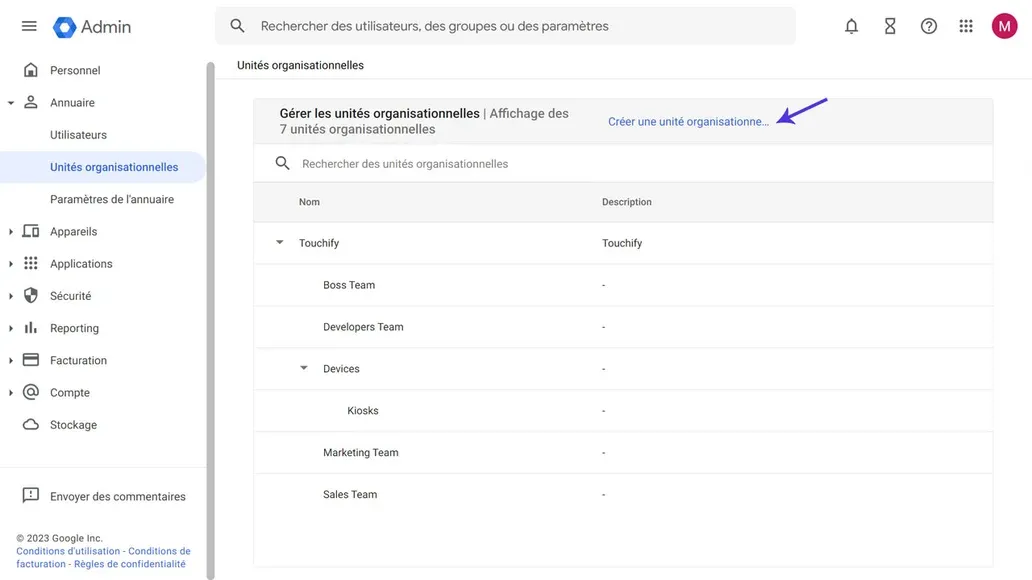
In the Google Admin Console menu, navigate to Directory → Organizational units.
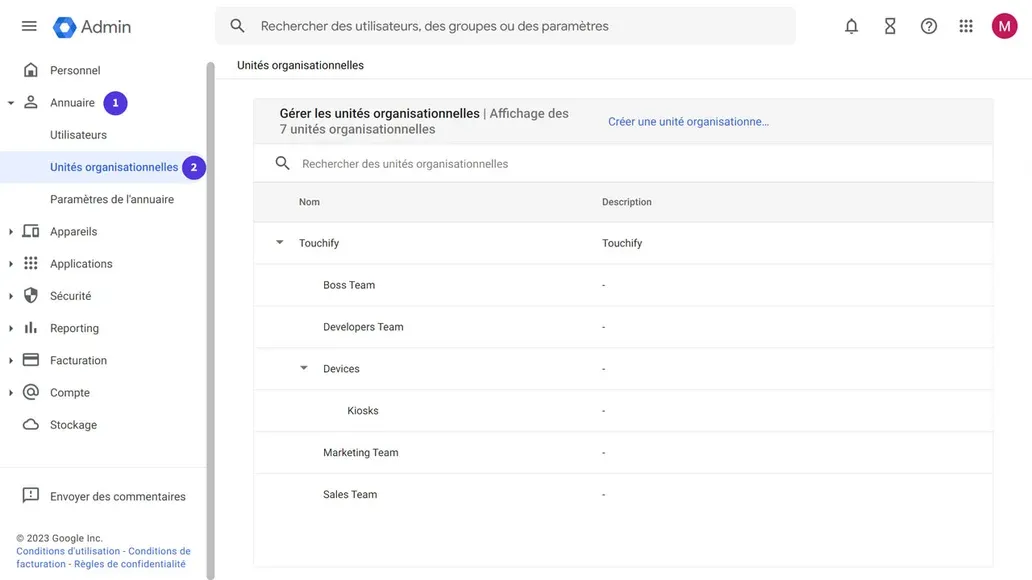
Then click the Create organizational unit link at the top right of the screen.
In the window, enter the following information, then click the Create button:
- Organizational unit name: Enter a name for the group (e.g.: Kiosk devices).
- Description: (optional) Optionally enter a description for the group.
- Parent organizational unit: Specify the parent organizational unit (the newly created unit will inherit the settings of the parent unit).
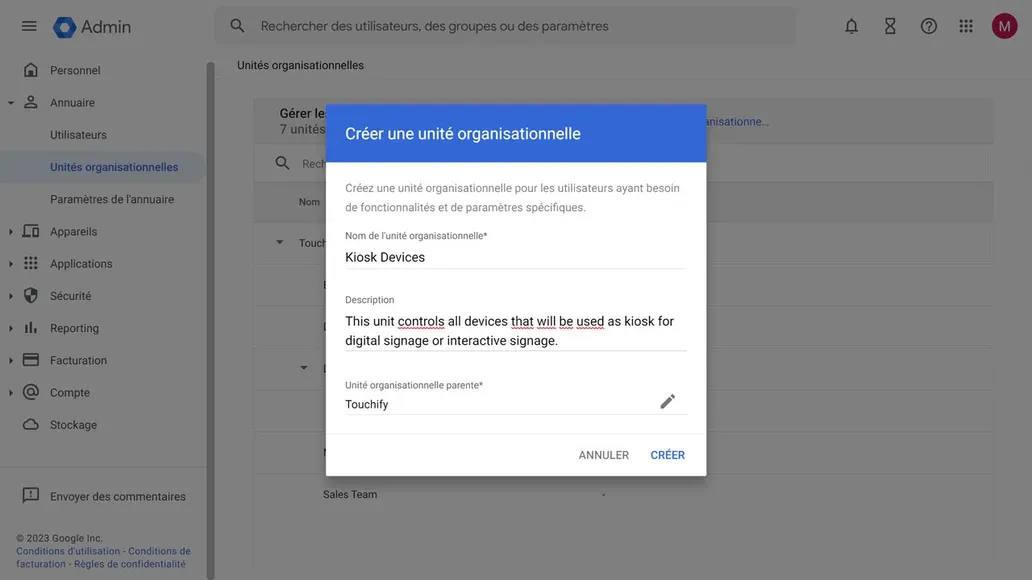
You now have an organizational unit where you can register your devices and configure them centrally.
Create an enrollment user (optional)
A best practice recommended by Google is to create a user dedicated to device enrollment.
Start by creating a user as you normally would, then move them into the organizational unit where you want to enroll your device.
Once your user is created and placed in the correct organizational unit, navigate to Devices → Chrome → Settings → Users & browsers then look for the Enrollment settings section.
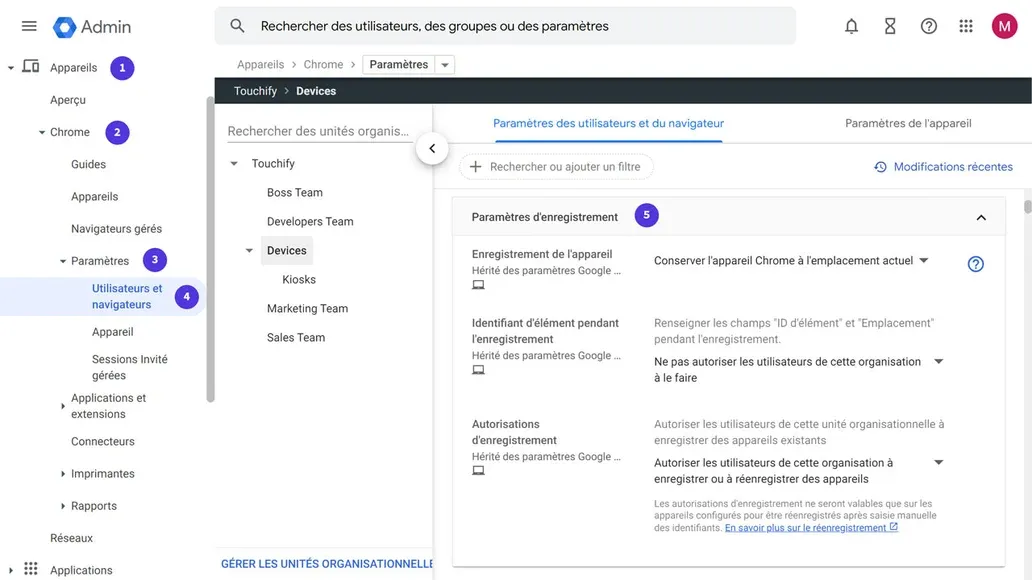
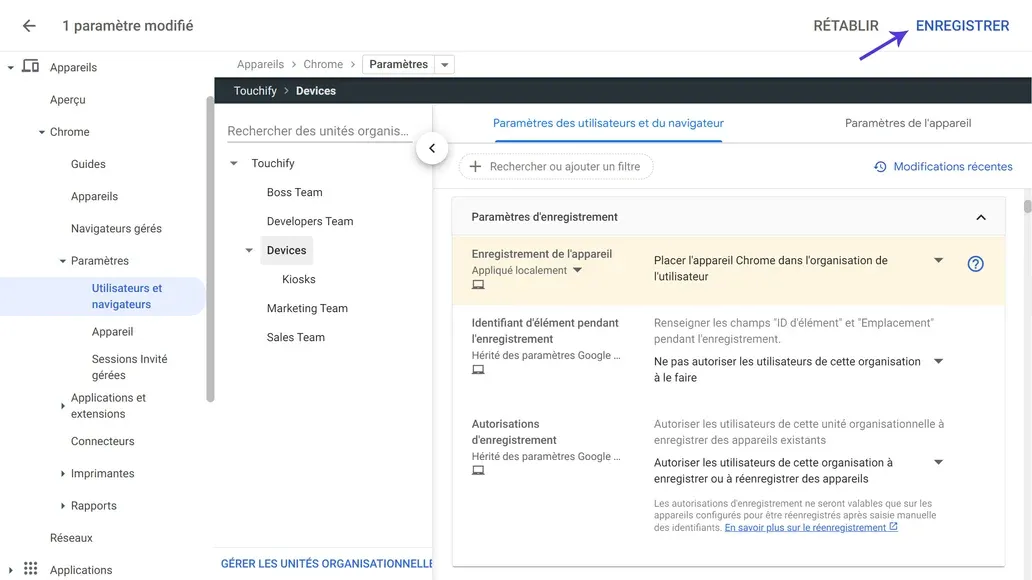
For the Device enrollment setting, select Place the Chrome device in the user's organization. A confirmation window appears, click OK.
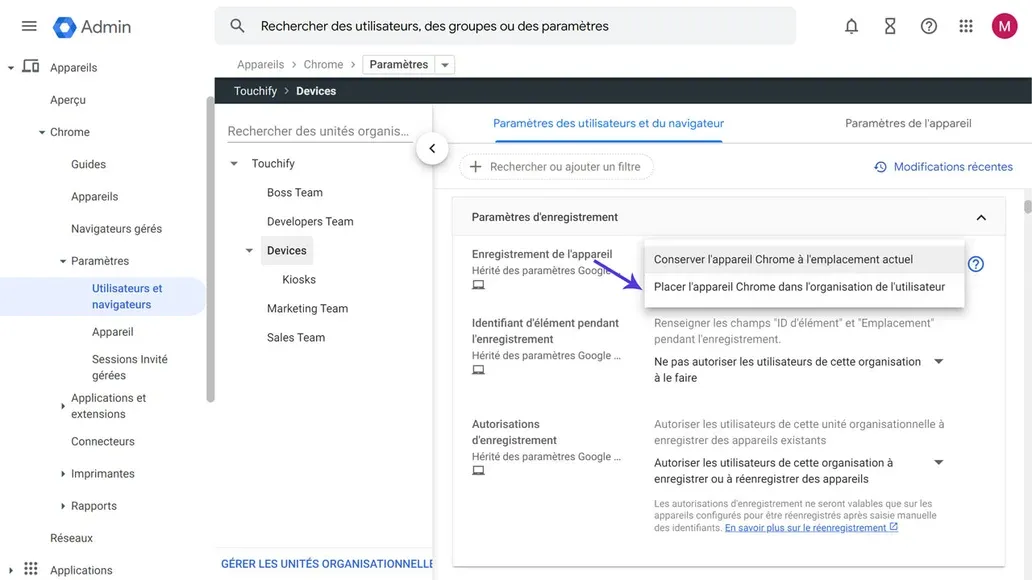
Then click the Save button at the top right of the screen to confirm your configuration.
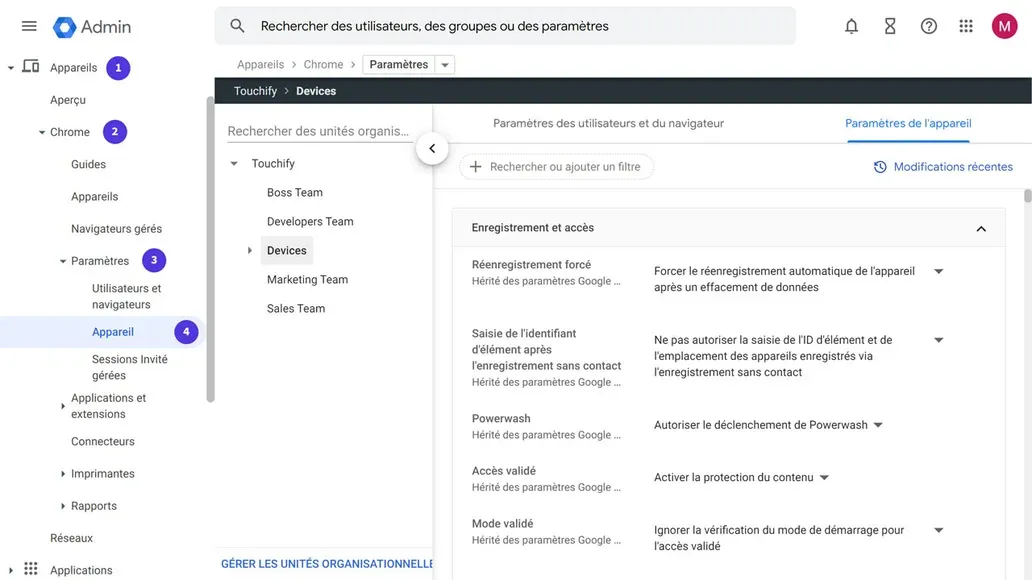
Device Configuration
In the Google Admin Console menu, navigate to Devices → Chrome → Settings → Devices.
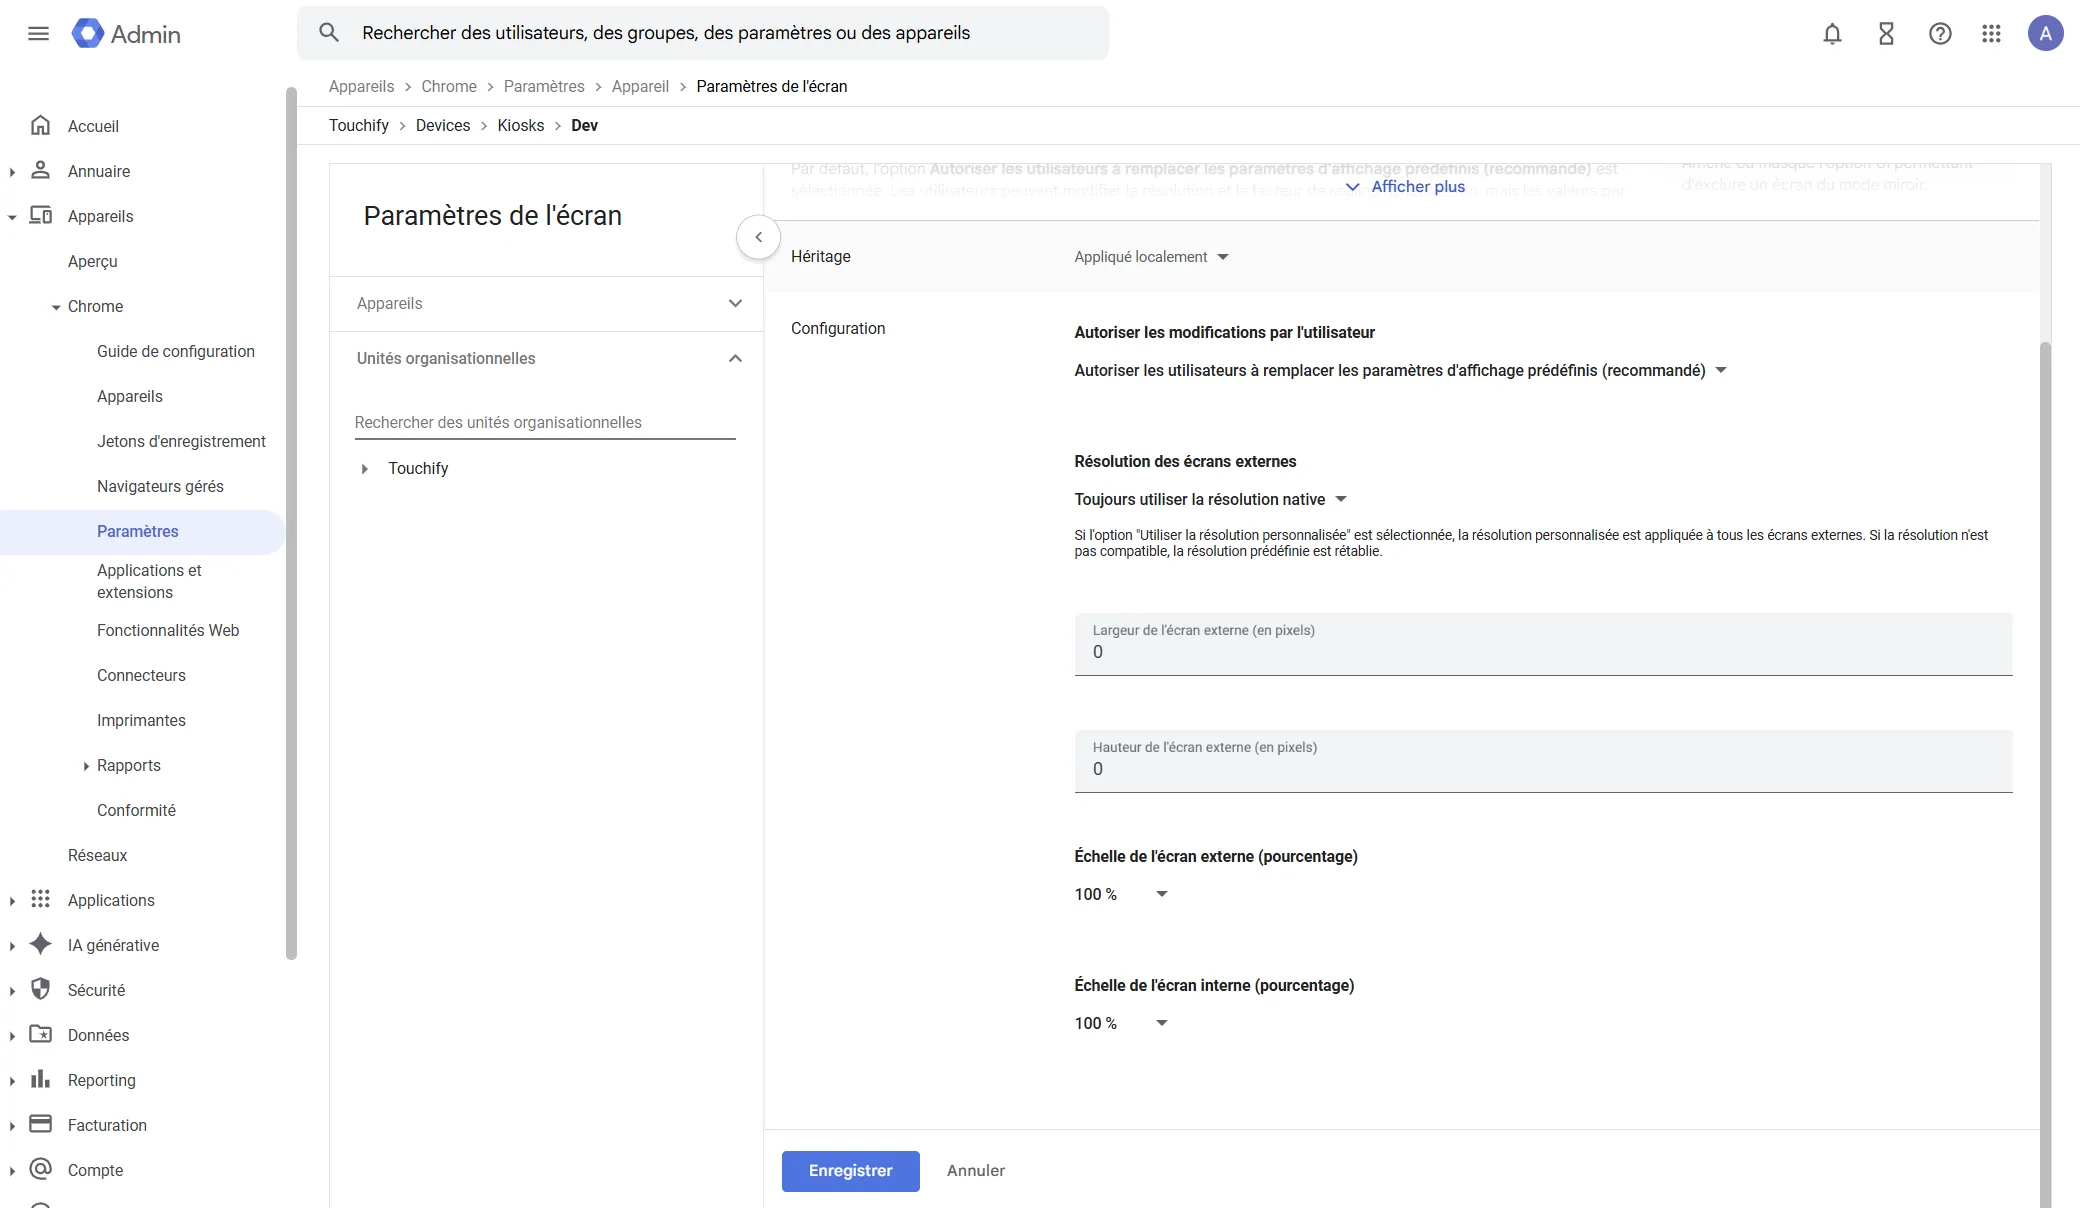
Display Settings
In the search box, enter display to filter the list of settings.
In the Screen settings section, we recommend the following settings:
- External screen scale: 100%
- Internal screen scale: 100%
Kiosk Settings
In the search box, enter kiosk to filter the list of settings.
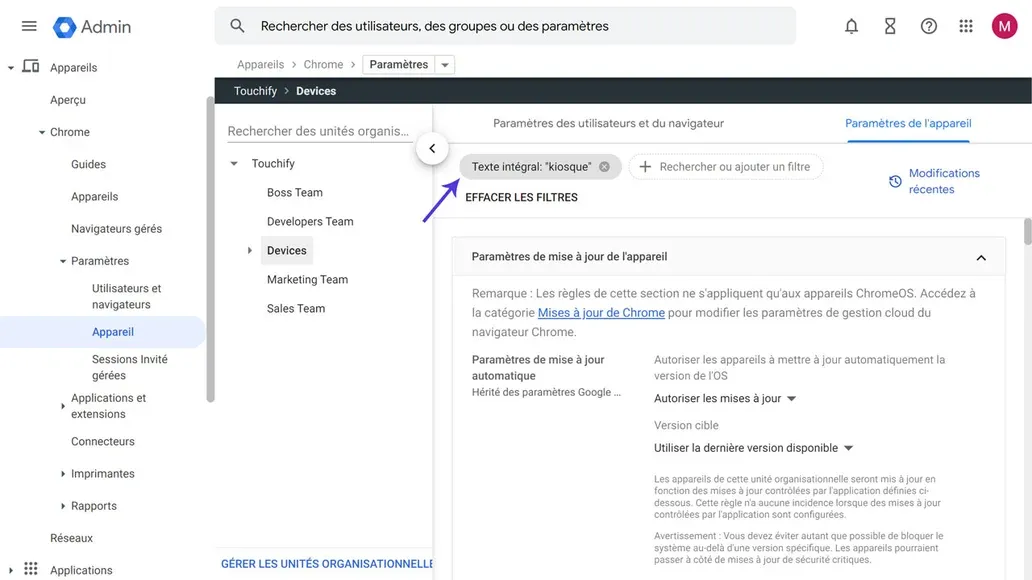
In the Device update settings section, we recommend the following settings:
- Allow devices to automatically update OS version: Allow updates
- Target version: Use the latest available version
- Rollback to target version: Do not rollback OS
- Target version: Stable version
- Deployment plan: Default
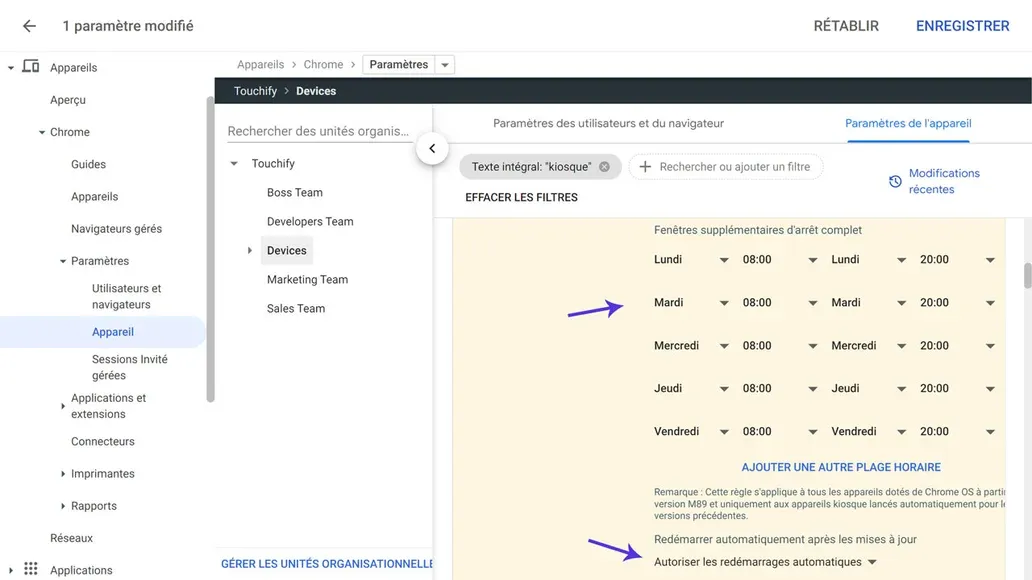
- Additional shutdown window: Add your business hours (times when you do not want updates). Enter times day by day
- Automatically restart after updates: Allow automatic restarts
For more information on these settings, click here.
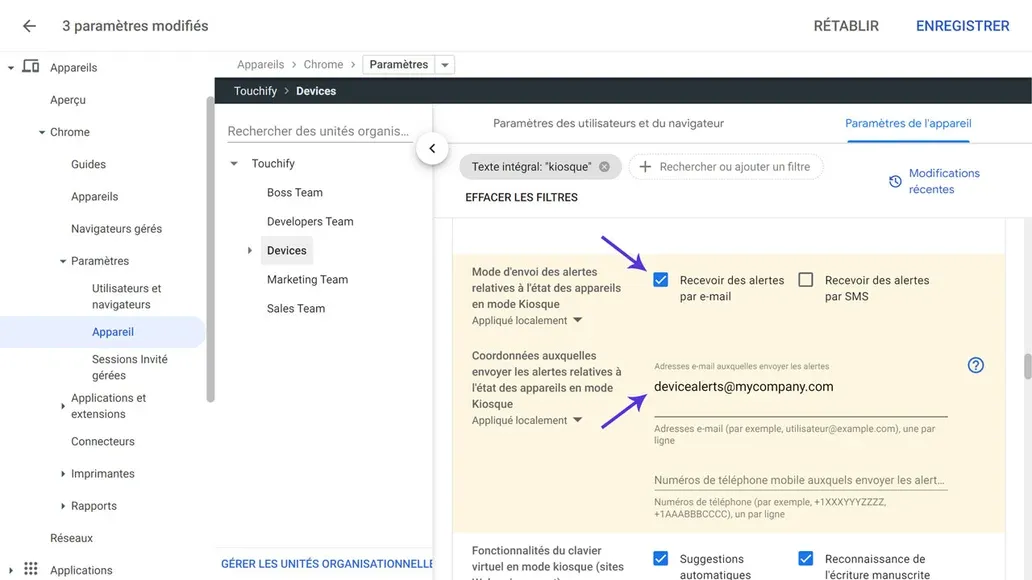
In the Kiosk settings section, we recommend the following settings:
- Kiosk device status alert sending mode: Check at least one box (email or sms)
- Contact details for kiosk device status alerts: Enter at least one email address or phone number (depending on the box checked above)
For more information on these settings, click here.
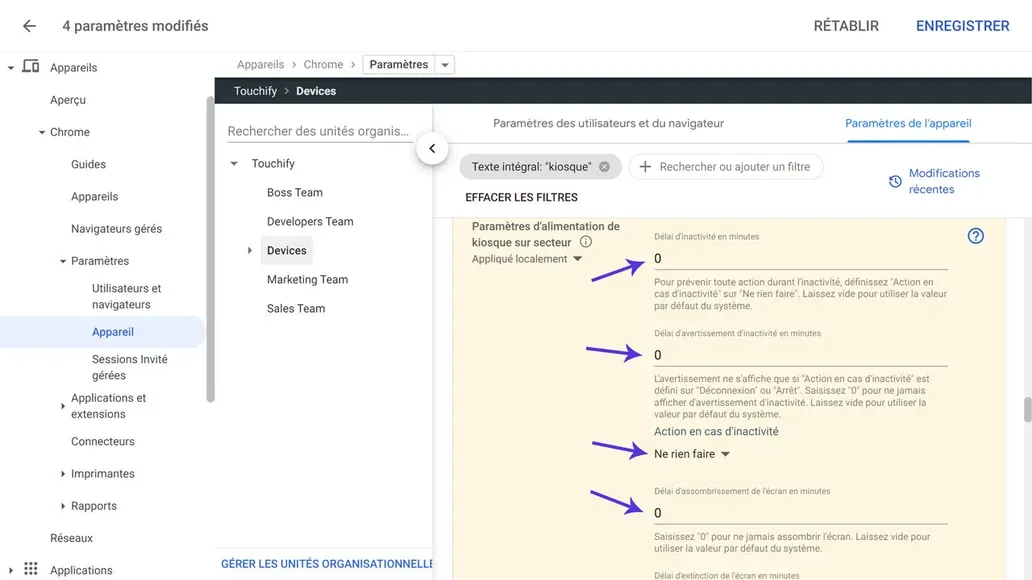
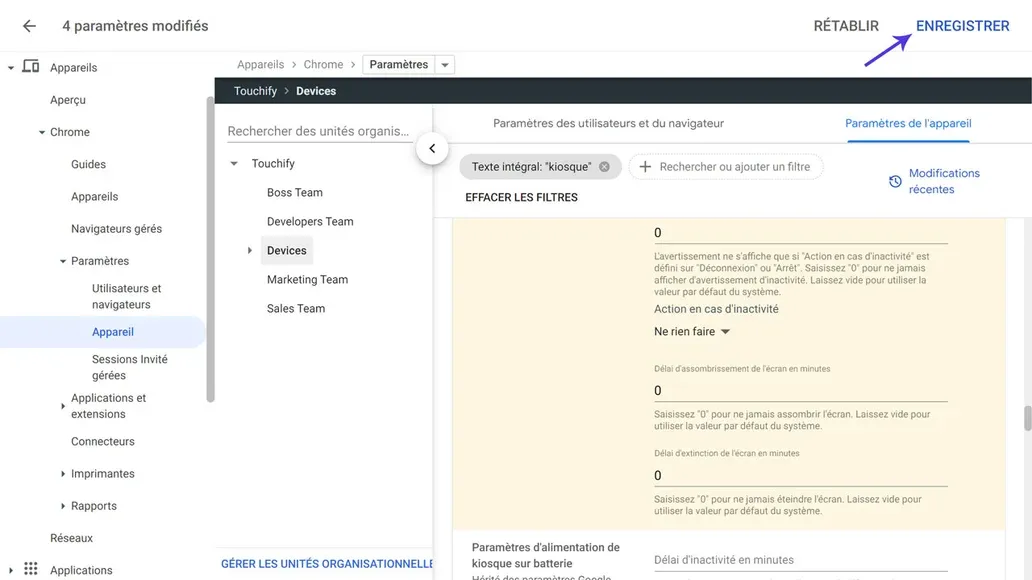
In the Kiosk power settings section, we recommend the following settings:
- Inactivity timeout in minutes: 0
- Inactivity warning timeout in minutes: 0
- Action on inactivity: Do nothing
- Screen dimming timeout in minutes: 0
- Screen off timeout in minutes: 0
Once all settings are entered, you can click the Save button at the top right of the screen.
Associate the device with Touchify from the Google Admin Console
The Touchify Player app can be configured remotely from the Google Admin Console.
In the Google Admin Console menu, navigate to Devices → Chrome → Apps & extensions → Kiosks then click on the Touchify Player app previously installed. To install the Touchify Player app, refer to the Option 3: Kiosk installation section.
In the app settings window, edit the Managed configuration parameter with the following value:
{ "DeploymentKey": "<your deployment key>" }
For example, if your deployment key is 123 456 789 123, the value should be:
{ "DeploymentKey": "123456789123" }
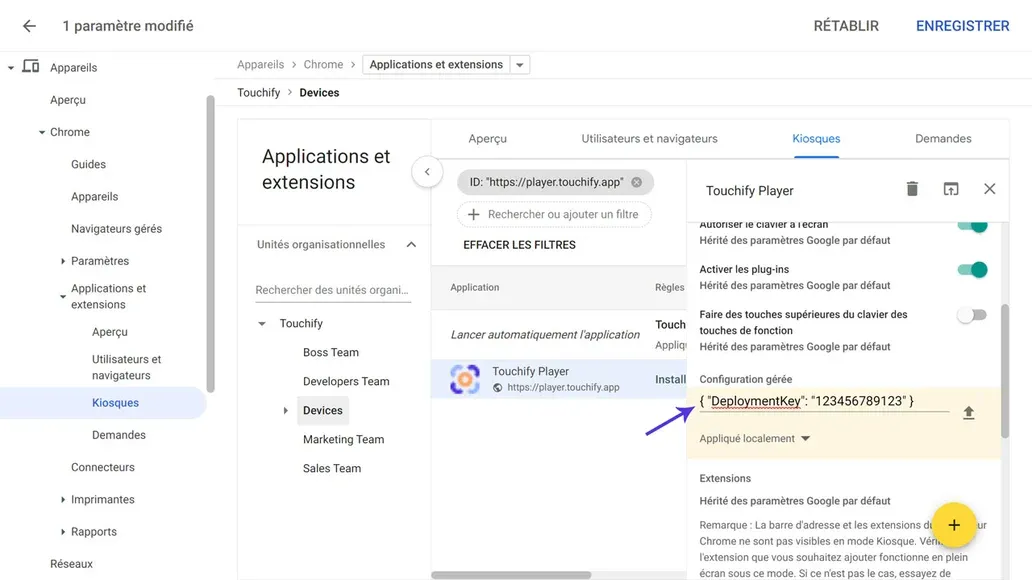
Then click the Save button at the top right of the screen.

That's it, the Touchify Player app will automatically associate with the selected broadcast group on all devices in the selected Organizational Unit.